Color-coded revision for a messy mind
I’m not a plotter by nature. My writing process is messy. But when it comes time to revise, I want to be able to see a good chunk of the novel on my screen at one time. I want a visual reminder of where I need to focus my energy. I want a way to see at a glance that I’ve made progress.
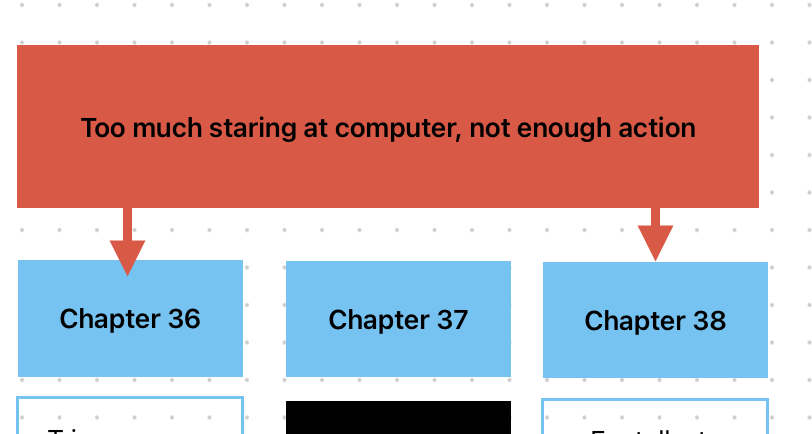
Enter Freeform, a digital whiteboard. It helps me keep track of where I am in a story, which chapters need work, and what themes or ideas I still want to explore. I have tried commercial plotting apps, but I couldn’t make them do what I wanted them to. Through trial and error, I’ve come up with a simple way to make the digital whiteboard work for me by depicting chapters, scenes, and revision notes on a simple grid. Here’s how it works:
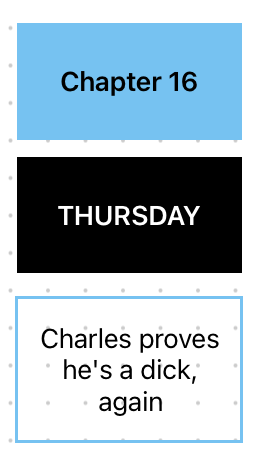
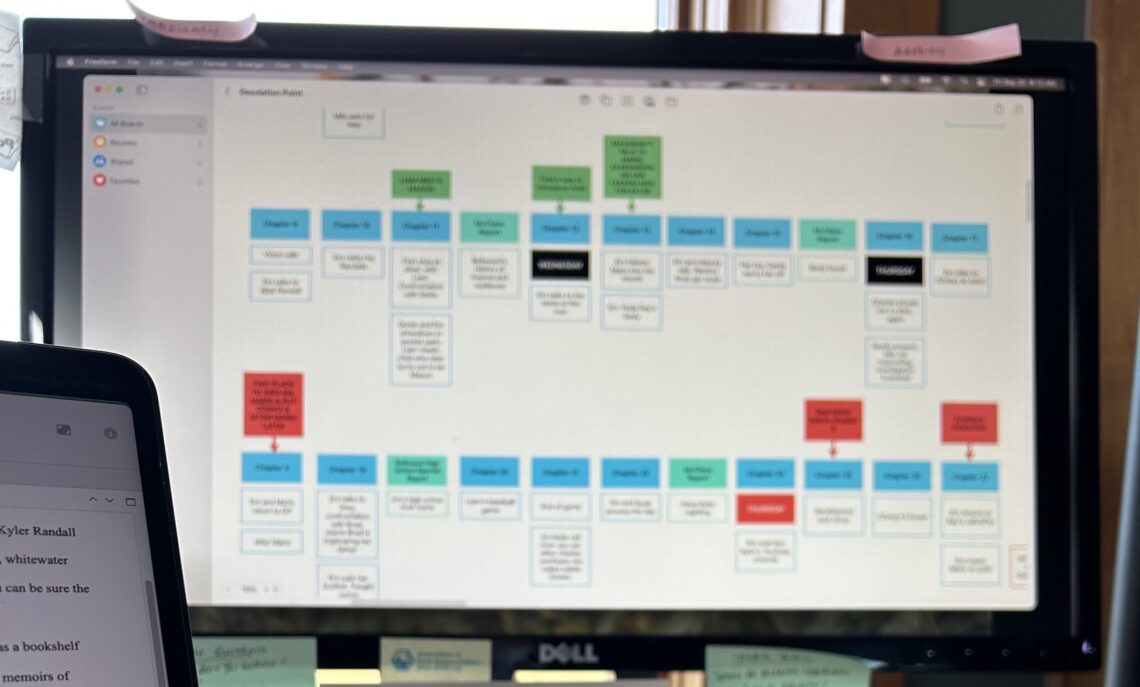
- Solid blue boxes represent chapters.
- White boxes outlined in blue represent scenes within a chapter. I give each a short description — “flat tire,” for example, or “Charles proves he’s a dick, again.”
- Solid light teal boxes are interludes between chapters.
- Solid black boxes represent the day of the week.
I lay the chapter boxes out 10 or 11 across, one screen’s width. I stack scenes under the chapter, and insert day of the week boxes where needed. As I have it set up, each box is independent and can move around as needed. The drawback is if I insert a new chapter or delete one, I have to make space and all subsequent chapters have to be renumbered by hand — no automation. But honestly? Moving boxes around the board helps me think through the changes I want to make, and it’s an excellent way to procrastinate. 🙂
I leave plenty of space for notes between chapter rows. As I’m thinking through my revisions, I add red boxes to capture questions, ideas, and inconsistencies that must be addressed. I use yellow for ideas I’m not sure about yet, and green to show I’ve made the change or addressed the issue in some way.
When I feel fancy, I add an arrow between the “to do” box and the chapter I need to do it in. I use the space to the side of the grid as a kind of “parking lot,” where I dump summaries of scenes I’ve deleted but may want to put back in later.
Oh! And because I’m not a plotter, I create the grid as I draft, not before.
That’s it!
In earlier drafts, I kept the chapter boxes in one row, but the grid is easier to scroll and keep the bigger picture in mind. I can see 20 or more chapter summaries at a time in the grid, compared to 10 or so for a straight line.
The digital whiteboard also allows digital sticky notes, which I used extensively in early drafts to keep track of every idea, note, to do, and stray thought related to the manuscript. A note might say, for example, “you left a clue in chapter 2 — don’t forget to follow through” or “MC needs to show more emotion!!!” Sticky notes can be color coded, too, the same way boxes are. In my early drafts, I used traditional yellow to represent something I needed to do or think about. Gray meant I’d dealt with that item.
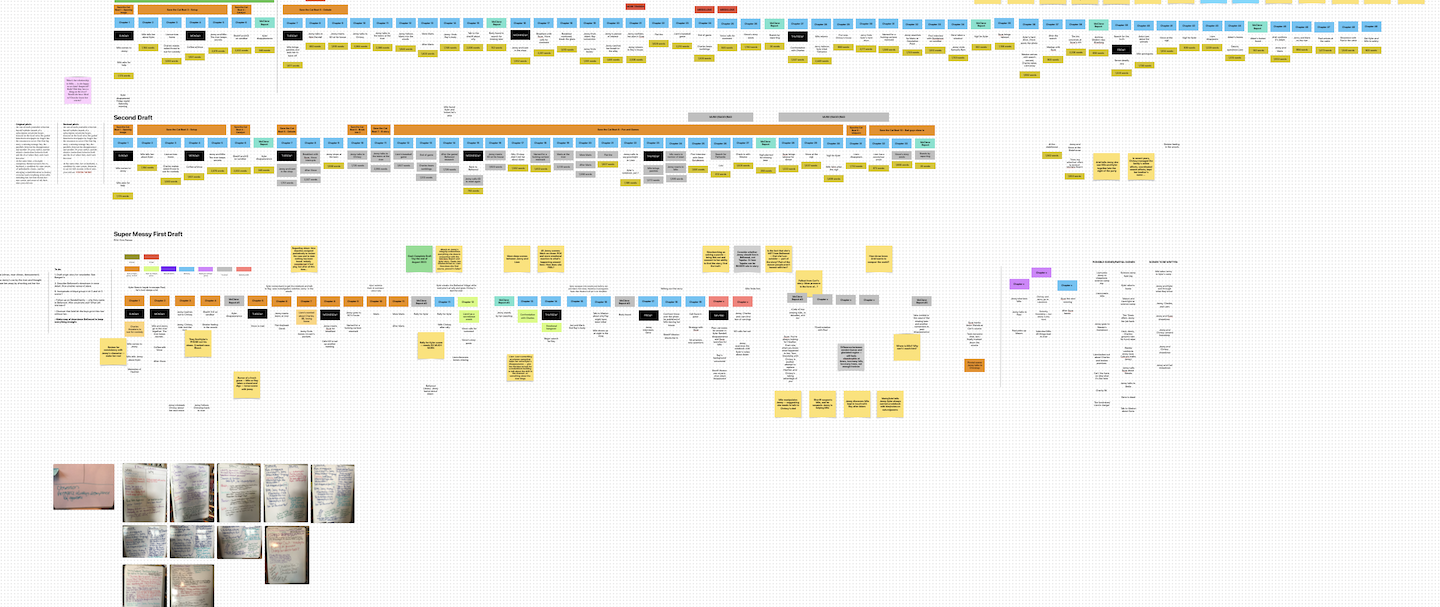
I don’t know what Freeform’s limits are, but my board for my work in progress contains timelines for all six drafts, photos of notes from my physical whiteboard (a two-sided behemoth on wheels that still fills up too quickly), and digital sticky notes. It’s keeping me organized as I finish this (final?) revision, and every time I get to change a red box to green, I get a little kick of satisfaction that keeps me going when I need motivation.
